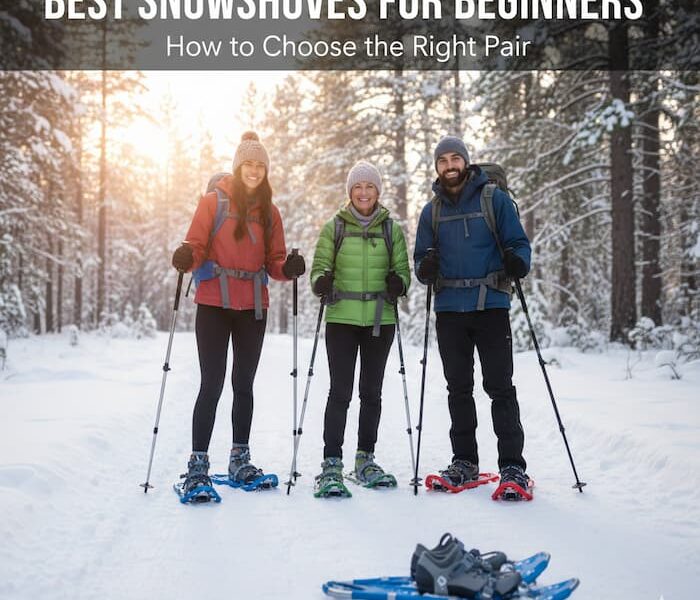
Best Snowshoes for Beginners: How to Choose the Right Pair
January 1, 2026Snowshoeing is one of the most accessible winter sports because, as the saying goes, “if you can walk, you can snowshoe.” However, for a beginner, the transition from a dry summer trail to a powdery winter landscape requires a shift in how you think about your gear. The primary goal of a snowshoe is flotation, spreading your weight across a larger surface area so you stay on top of the snow rather than “post-holing” (sinking to your knees). When you’re just starting, the goal is to find a pair that provides this buoyancy without feeling like an anchor on your feet. Consider looking for Backcountry Snowshoes that are well-suited for beginners.
While the motion is natural, snowshoeing does require a slightly wider gait to avoid stepping on your own frames. Newcomers often find that the first 20 minutes feel a bit awkward, but the modern design of recreational snowshoes, which are usually tapered at the tail, greatly reduces this learning curve. For your first few outings, it is highly recommended to stick to groomed trails or local parks with flat or rolling terrain. This allows you to get a feel for the equipment and how it handles different snow textures from crunchy “crust” to soft powder without the added physical strain of Steep Mountain inclines.
The most critical takeaway for any beginner is that your height or your shoe size does not determine snowshoe sizing, but rather your total loaded weight. In the winter, you aren’t just your body weight; you are also carrying heavy insulated boots, multiple layers of clothing, and a backpack filled with water and safety gear. This extra load can easily add 15–20 pounds to your baseline weight. If you choose a snowshoe that is too small for this total load, you will lack the necessary surface area to stay afloat, making the activity significantly more exhausting.
Ultimately, choosing the right snowshoes is about building a foundation for confidence. By starting with recreational-style snowshoes, which prioritize simple bindings and lightweight materials, you remove the “technical overwhelm” that comes with high-end mountaineering gear. Pairing these with a set of trekking poles, which provide two extra points of stability, will help you navigate the winter woods with ease. Once you’ve matched your equipment to your weight and the terrain, you’ll find that the “confusing” world of snowshoeing disappears, leaving only the quiet, serene beauty of the winter trail.
If you’re brand new to the activity, start with our complete guide: Snowshoeing for Beginners: Gear, Tips, and Safety
Understanding the type of snowshoes you need is vital, especially when choosing Backcountry Snowshoes for your adventures.
Why Choosing the Right Snowshoes Matters
Snowshoes aren’t one-size-fits-all. The wrong pair can cause:
- Poor flotation (sinking into snow)
- Foot fatigue and discomfort
- Reduced traction on slopes
- Frustration that takes the fun out of your trip
Beginner-friendly snowshoes are designed to be lightweight, stable, and easy to use, allowing you to focus on enjoying the outdoors rather than fighting your gear.
Types of Snowshoes Explained – Beginner-Friendly Breakdown
Understanding snowshoe categories is the first step in choosing the right pair.
1. Recreational Snowshoes (Best for Beginners)
Recreational snowshoes are specifically designed for beginners or casual users who plan to explore flat or gently rolling terrain. Because they are lightweight and feature simple binding systems, they are remarkably easy to walk in, making them the most accessible option for those new to the activity. These snowshoes perform best on packed snow or groomed trails, such as those found in local parks and forests. If your goal is to enjoy a relaxed winter walk without the need for technical features, recreational snowshoes are the ideal choice.
Recommended for: First-time users, casual snowshoers, flat or rolling terrain, because they are Lightweight, Easy to walk in, Simple binding systems, and Ideal for packed snow and groomed trails.
2. Backcountry Snowshoes
Backcountry snowshoes are high-performance tools engineered for experienced adventurers who plan to leave the groomed trails and head into deep powder or steep, icy mountains. Unlike recreational models, they feature aggressive traction systems, including sharp toe crampons and serrated side rails that act like teeth to bite into ice and prevent sliding on sideways slopes. Their larger surface area is crucial for “flotation,” ensuring you stay on top of soft, waist-deep snow rather than sinking.
One of their most technical features is the heel lift (or climbing bar), a small wire bail you can flip up under your heel. This keeps your foot in a level position while climbing steep inclines, significantly reducing calf fatigue and making mountain ascents feel more like walking up a staircase. Because they use heavy-duty materials to withstand the torque of rugged terrain and have advanced, secure bindings designed for bulky mountaineering boots, they can be heavier and more physically demanding to use. For a beginner on a flat park trail, these shoes would be unnecessarily bulky, but for a winter summit or a deep-woods expedition, they are essential for safety and efficiency.
Recommended for: Experienced users, deep snow, and rugged terrain.
3. Running or Fitness Snowshoes
Running or fitness snowshoes are specialized tools built for speed and high-intensity aerobic exercise, rather than casual exploration. Unlike recreational or backcountry models, they feature a significantly shorter and narrower frame, often with a tapered “V-shaped” tail. This sleek design is intentional: it prevents the shoes from clipping against each other during a fast stride, allowing for a natural, athletic gait instead of the wide-legged “waddle” often associated with traditional snowshoeing. To further support speed, they are constructed from ultralight materials and utilize high-tension or spring-loaded bindings that keep the snowshoe tight against your foot, providing a snappy return with every step and preventing the frame from flopping or dragging.
Because they prioritize agility and low weight, fitness snowshoes have a much smaller surface area, which means they provide minimal flotation. Consequently, they are not suitable for beginners or deep, powdery snow, as the user would likely sink or “post-hole” immediately. They are designed almost exclusively for packed trails, groomed racing courses, or firm, crusty snow where the ground can support the concentrated weight. For runners looking to maintain their cardio during winter, these snowshoes offer a grueling, low-impact workout that engages the core and hip flexors far more than road running, but they require a pre-existing level of fitness and specific trail conditions to be effective.
Recommended for: Athletic users, packed trails, and beginners.
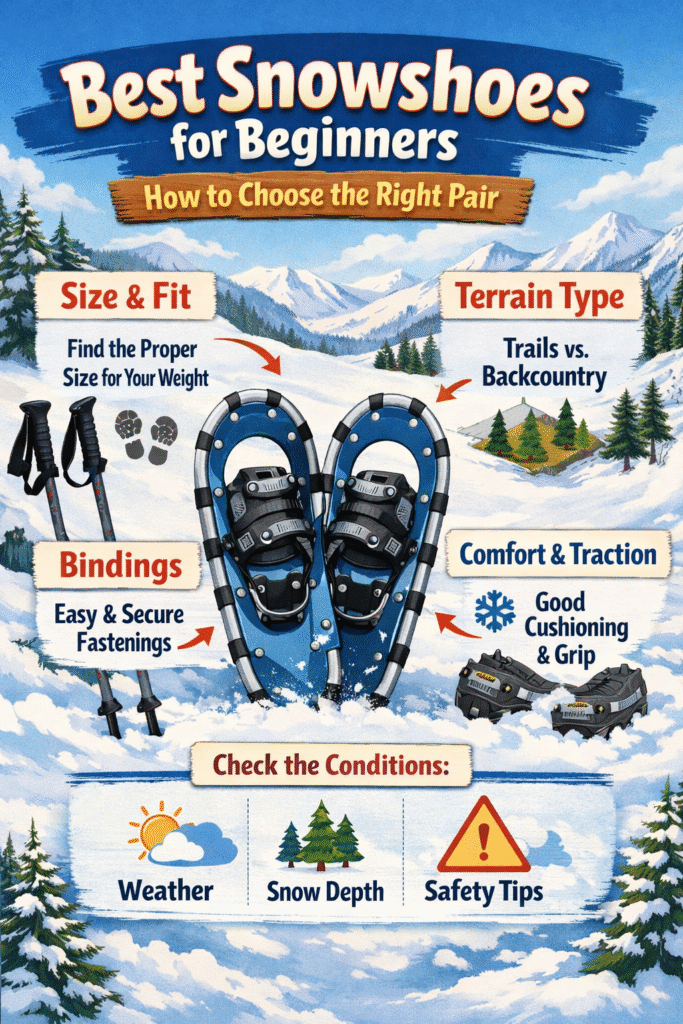
Snowshoe Sizing: How to Choose the Right Size
Choosing the correct snowshoe size is arguably the most critical step in ensuring a comfortable winter outing, as it directly determines your flotation, the ability to stay on top of the snow rather than sinking. Unlike traditional footwear, snowshoe sizing is not based on your shoe size, but rather on your total weight load. This total load includes your body weight plus every additional ounce you carry, such as heavy winter layers, insulated boots, and a backpack filled with water, food, and emergency gear. For most hikers, this “gear weight” adds an extra 10 to 15 pounds to their base body weight, which can easily push them into a larger snowshoe category.
Why Surface Area Matters
The principle of snowshoeing is weight distribution; the larger the surface area of the snowshoe, the more effectively it spreads your weight across the snow’s surface.
- Smaller Snowshoes (20–25 inches): Generally best for total loads up to 150 lbs. These are easier to maneuver and better for packed trails.
- Medium Snowshoes (25–30 inches): Ideal for loads between 150 and 200 lbs. This is the most popular size range for average adults.
- Large Snowshoes (30+ inches): Required for total loads over 200 lbs or for anyone venturing into deep, untouched powder.
The “In-Between” Rule
If you find yourself right on the edge of two sizes, consider your typical environment. If you usually hike on packed or groomed trails, choose the smaller size, as it will be lighter and less cumbersome. However, if you plan to “break trail” in deep, fluffy powder, you should size up. While a larger snowshoe provides better flotation, it also requires a wider gait and more energy to lift, so the goal is to find the smallest possible size that still prevents you from “post-holing” (sinking deep into the snow).
Terrain Matters: Match Snowshoes to Where You’ll Go
When selecting snowshoes, matching your gear to the specific terrain you’ll be traversing is essential for both comfort and safety. Each environment places different demands on the equipment, from the traction needed for icy slopes to the surface area required for soft powder.
Flat and Rolling Terrain
For those sticking to casual trails, local parks, or forest preserves, recreational snowshoes are the most effective and economical choice. Because these areas rarely feature significant inclines or ice, you only need minimal traction, usually consisting of basic toe crampons under the ball of the foot. These snowshoes prioritize comfort and ease of use, featuring lightweight frames and simple, “set-it-and-forget-it” binding systems. They allow for a natural walking gait on packed snow without the added weight or complexity of technical mountain features.
Hills and Slopes
When your route involves elevation gain, your snowshoes must transition from simple walking aids to climbing tools. The most critical feature for this terrain is the heel lift (also known as a climbing bar), a small wire bail you flip up under your heel to keep your foot level while walking uphill, significantly reducing calf strain. You should also look for more robust steel crampons and lateral traction rails that bite into the snow to prevent side-slipping on angled traverses. Because hills require more foot control, these models often feature advanced binding systems that wrap more securely around your boot to ensure the snowshoe doesn’t twist or shift under pressure.
Deep Powder Snow
Venturing into untouched, “off-trail” powder requires a focus on flotation above all else. In these conditions, you need a larger surface area and a wider deck design to distribute your weight and prevent “post-holing,” the exhausting process of sinking deep into the snow with every step. These snowshoes are typically longer (often 30 inches or more) and have a wider profile to keep you buoyant on top of soft drifts. It is crucial to avoid compact fitness snowshoes in deep powder, as their small frames are designed for speed on packed surfaces and will offer virtually no support in fluffy, deep snow.
Key Snowshoe Features Beginners Should Look For
When purchasing your first pair of snowshoes, understanding the key components will ensure you choose a pair that is both functional and frustration-free. Focusing on these four specific features will help you navigate different snow conditions with confidence and ease.
Bindings: The Connection Point
The binding is the most critical feature because it determines how much control you have over the snowshoe. For beginners, the best bindings feature quick-pull straps or “one-pull” systems that allow you to tighten the entire harness with a single movement. It is vital to find glove-friendly adjustments, such as oversized buckles or rubberized straps, so you can make changes in freezing temperatures without exposing your hands to the elements. A high-quality beginner binding should also provide secure heel support, usually a thick strap that wraps around the back of your boot to prevent your foot from sliding backward while you walk. While professional models might use complex ratcheting systems, beginners should prioritize simplicity and a snug, reliable fit.
Traction: Stability on Ice and Slopes
Traction is provided by “crampons,” which are the metal teeth located on the underside of the snowshoe. Even on beginner trails, you will encounter icy patches or packed-down sections where traction is necessary to prevent falls. Beginner snowshoes should prioritize toe crampons located directly under the ball of your foot; these dig into the snow as you push off, providing forward momentum. Additionally, look for heel traction or side rails, which act as brakes to provide stability when walking downhill. Most reliable models use stainless steel or aluminum teeth, as these materials are rust-resistant and sharp enough to penetrate crusty snow without adding significant weight to your feet.
Frame and Decking Materials
The frame and “decking” (the material stretched across the frame) determine how the snowshoe feels and sounds. Most entry-level snowshoes utilize aluminum frames, which are prized for being incredibly lightweight yet durable enough to withstand rocks and hidden branches. The decking is often a composite or heavy-duty nylon material that is designed to be flexible and quiet. While high-end carbon fiber frames exist, they are often too stiff for newcomers. For a beginner, the material is less important than the flotation it provides; focus on a frame that feels balanced and doesn’t clank loudly against the snow as you move.
Heel Lifts: Saving Your Energy
A heel lift, also known as a climbing bar, is a small wire flip-up tab located under your heel. While it may seem like a minor accessory, it is a game-changer for anyone planning to hike on moderate slopes. When you walk uphill, the lift keeps your foot in a level, horizontal position even though the snowshoe is angled upward. This simple mechanical advantage significantly reduces calf fatigue and Achilles tendon strain. While not strictly necessary for flat park walks, having heel lifts is a fantastic “bonus feature” for beginners who want the versatility to explore more varied trail systems in the future.
What Boots Work Best with Snowshoes?
One of the best things about snowshoeing is that you don’t need specialized “snowshoe boots” to get started. Most high-quality outdoor footwear you already own will work, provided it offers three specific qualities: waterproofing, insulation, and stability. Since snowshoeing is a high-output activity, your feet will generate heat, but they will also be in constant contact with cold snow. For this reason, waterproof hiking boots are often considered the gold standard for beginners. They provide the necessary ankle support to handle uneven terrain while keeping your feet dry during long treks. If you are venturing out in sub-freezing temperatures, look for insulated winter boots (often rated by grams of insulation, such as 200g or 400g) to prevent your toes from going numb during breaks.
What to Look For
When selecting a boot from your closet, ensure it has a stiff sole and a sturdy upper. Snowshoe bindings exert constant pressure on the sides and top of your foot; a soft shoe will compress under these straps, leading to pinched nerves, restricted circulation, and cold feet. A boot with a high-cut ankle is also preferable as it provides a solid surface for the heel strap to grip and helps prevent snow from falling inside the boot. If you find your boots are a bit short, you can pair them with gaiters, waterproof sleeves that cover the gap between your boots and pants to keep your socks perfectly dry in deep powder.
What to Avoid
For a safe and comfortable experience, there are several types of footwear you should leave at home. Soft sneakers and trail runners are generally poor choices because they lack the structural integrity to support binding straps and offer almost no protection against the wet and cold. Similarly, avoid non-waterproof shoes, as even a small amount of melted snow can lead to damp socks and, eventually, frostbite. While bulky mountaineering boots or plastic climbing boots are technically compatible, they are often overkill for beginners; they are heavy, expensive, and can make walking on flat trails feel unnecessarily clunky and exhausting. Stick to a reliable, well-broken-in pair of waterproof hikers for the best balance of comfort and control.
Common Beginner Mistakes When Buying Snowshoes
Purchasing snowshoes for the first time can be overwhelming, and many newcomers fall into traps that lead to sore muscles or a frustrating trail experience. To ensure your first winter outing is a success, here is a detailed breakdown of the most common mistakes beginners make.
Underestimating Total Weight Capacity
The most frequent error is selecting a snowshoe based solely on body weight. Manufacturers’ weight ratings refer to the “total load,” which includes your body weight plus the significant weight of winter boots, heavy parkas, and a backpack filled with water and gear. This extra equipment can easily add 15 to 25 pounds to your scale weight. If you ignore this total capacity, you will lack the necessary surface area to stay buoyant, causing you to “post-hole” or sink deeply into the snow, which makes walking twice as exhausting.
Buying Small for “Easier Walking”
While it is true that smaller snowshoes are more maneuverable and feel less like “clown shoes,” buying the smallest size just for the sake of convenience is a mistake. Snowshoeing is fundamentally about flotation. If you choose a 22-inch shoe because it’s easier to walk in, but you actually need a 25-inch shoe for your weight, you will sink. On the other hand, don’t go too big unless you are in deep powder; the goal is to find the minimum size that supports your total weight for the specific snow conditions you expect to encounter.
Overbuying: Backcountry and Advanced Features
Beginners often fall for “marketing hype” and purchase high-end backcountry or mountaineering models before they need them. These shoes are built for extreme ice and vertical climbs; they are heavier, much more expensive, and feature aggressive “teeth” (crampons) that can actually be a tripping hazard on flat park trails. Similarly, avoid overpaying for specialized features like ultra-light carbon frames or complex professional bindings. For most beginners, a reliable recreational model provides the best balance of comfort, weight, and price.
Ignoring Binding Comfort and Simplicity
In the store, many people focus on the “look” of the snowshoe and forget to test the bindings with their actual winter boots. A common mistake is choosing a binding system that is too complex to operate while wearing thick gloves or one that creates “hot spots” (painful pressure points) on the top of your foot. If a binding is difficult to adjust in a warm store, it will be nearly impossible to manage on a freezing, windy trail. Look for a system that is intuitive and stays secure without cutting off your circulation.
How Much Should Beginners Spend on Snowshoes?
When shopping for snowshoes, it is important to realize that the highest price tag doesn’t always equal the best experience for a beginner. Most newcomers find that mid-range models offer the best balance of weight, durability, and ease of use, while budget options are perfect for those who only plan to venture out a few times a year. In 2026, a budget investment ($70–$100) typically gets you a basic aluminum frame with a simple strap-based binding; these are highly effective for casual walks on flat, groomed trails or in your own backyard. These entry-level models prioritize “flotation” over technical features, making them a low-risk way to try the sport without a major financial commitment.
Mid-Range: The “Sweet Spot” for Most Users
Spending between $100 and $170 is widely considered the “sweet spot” for recreational users. In this price range, you move away from basic straps and into more sophisticated binding systems that are easier to adjust with cold hands. You’ll often find high-quality materials like injection-molded plastic decks (such as the MSR Evo series), which are nearly indestructible, or refined aluminum frames that offer a quieter, more natural stride. Many mid-range snowshoes now include heel lifts, a feature that significantly reduces calf fatigue on rolling hills, providing much more versatility if you decide to move beyond perfectly flat paths.
Premium Models: When to Spend More
Premium snowshoes priced at $200 and above are generally designed for “Backcountry” or “Mountain” terrain and are often unnecessary for a beginner’s first season. These models command a higher price because they use ultralight materials like carbon fiber or high-grade alloys and feature aggressive traction systems with 360-degree crampons for biting into solid ice. While these features are life-saving for winter mountaineers, they can be a hindrance on casual trails—the aggressive teeth can catch on roots or rocks, and the specialized bindings are often more complex than a beginner needs. Unless you plan on summiting mountains or breaking trail in deep, remote wilderness, you are better off focusing on fit and comfort rather than brand prestige or technical overkill.
Best Beginner Snowshoe Brands (Reliable & Beginner-Friendly)
When selecting your first pair of snowshoes, choosing a reputable brand is the best way to ensure your equipment is durable, safe, and backed by a solid warranty. Each of the major manufacturers has carved out a niche, offering specific technologies that cater to different beginner needs, from ease of use to budget-friendly kits.
MSR (Mountain Safety Research)
MSR is widely regarded as the industry leader, particularly for its Evo and Revo series, which are perennial favorites for beginners. They are famous for their injection-molded plastic decks, which are virtually indestructible and offer a slight “flex” that makes walking feel more natural. MSR’s “Paraglide” and “TriFit” binding systems are designed to be extremely secure and easy to tighten, even while wearing thick mittens. While they can be slightly more expensive, their long-term durability and the ability to add “modular flotation tails” (which extend the length of the shoe for deep powder) make them a smart long-term investment.
Tubbs and Atlas
Both Tubbs and Atlas are iconic brands known for their “traditional” designs and exceptional comfort. Tubbs is a go-to for beginners because of their “Flex” series, which features a torsion deck that reduces impact on your joints and promotes a smooth heel-to-toe roll. Atlas is often praised for its specialized suspension systems, which allow the snowshoe to move independently of your foot. This is incredibly helpful on uneven or slanted terrain where you need the shoe to stay flat while your ankle tilts. Both brands offer “Trail” or “Access” models that are specifically engineered for the ease of use that beginners require.
Yukon Charlie’s and Crescent Moon
For those looking for the best entry-point value, Yukon Charlie’s is a top choice, as they often sell complete beginner kits that include the snowshoes, trekking poles, and a carrying bag for one affordable price. Their bindings are intuitive and designed for quick entry, making them perfect for families. On the more innovative side, Crescent Moon has revolutionized the beginner market with their EVA foam snowshoes. These look and feel more like oversized running shoes than traditional frames; they are incredibly quiet, lightweight, and have a “rockered” shape that makes tripping almost impossible, making them arguably the most approachable option for someone who has never stepped into a snowshoe before.
Accessories Beginners Should Consider
While the right snowshoes are your most important purchase, several key accessories can transform a challenging outing into a comfortable and enjoyable adventure. These add-ons focus on two main goals: maintaining your balance on uneven surfaces and keeping your body heat regulated in freezing conditions. For beginners, investing in a few well-chosen accessories often makes the difference between a one-time trial and a lifelong hobby.
Stability and Protection: Poles and Gaiters
The most highly recommended accessory for any beginner is a pair of trekking poles equipped with snow baskets. Unlike summer hiking, snowshoeing requires you to maintain balance on shifting, uneven surfaces; poles provide two extra points of contact with the ground, which is essential for navigating slopes or recovering if you lose your footing. Ensure your poles have wide “snow baskets” (the circular plastic discs at the bottom) to prevent them from sinking straight into the powder. Additionally, gaiters are indispensable for deep-snow trekking. These waterproof sleeves wrap around your lower leg and the top of your boot, creating a seal that prevents snow from falling into your shoes. Without them, even the best waterproof boots can fill with snow, leading to wet socks and cold feet.
Comfort and Logistics: Socks and Storage
To stay warm, prioritize insulated socks made from moisture-wicking materials like Merino wool or synthetic blends. Beginners often make the mistake of wearing thick cotton socks, which trap sweat and lead to blisters and freezing toes; wool, however, retains heat even when damp. Beyond what you wear, consider how you will transport your equipment. A dedicated snowshoe carry bag or specialized gear straps are more than just a convenience; they protect the sharp crampons from damaging your car’s interior or snagging your clothing while you walk to the trailhead. These bags often feature mesh venting to allow your gear to dry properly after a day in the snow, preventing rust and extending the life of your equipment.
You can learn more in our Snowshoeing Gear Guide for Beginners
Snowshoes vs Microspikes: What’s Better for Beginners?
Choosing between snowshoes and microspikes often confuses beginners, but the decision ultimately depends on the depth of the snow and the condition of the trail. The primary function of snowshoes is to provide “flotation,” which is the ability to stay on top of the snow. This makes them the superior choice for deep snow, soft trails, and off-path exploration. Without snowshoes, a beginner attempting to walk through a foot of fresh powder would “post-hole,” sinking up to their knees or waist with every step. By distributing your weight over a larger surface area, snowshoes allow you to glide over deep drifts that would otherwise be impassable.
In contrast, microspikes, which are essentially sets of small metal chains and spikes that stretch over your existing boots, offer no flotation at all. Instead, they are designed purely for traction. They are the better option for icy sidewalks, hard-packed trails, or frozen inclines where the snow has been compressed by foot traffic into a solid, slippery surface. Because microspikes are lightweight and allow for a normal running or walking gait, they are excellent for safety on ice, but they are useless in deep powder where you would simply sink while wearing them.
For the quintessential winter hiking experience, snowshoes are the better beginner option because they offer the most versatility. They allow you to explore untouched winter landscapes and handle varying snow depths that microspikes cannot manage. Many experienced winter hikers actually carry both; they wear microspikes on the icy, well-traveled path near the trailhead and switch to snowshoes once they reach the deeper, softer snow further into the wilderness. If you can only choose one for a true “winter wonderland” adventure, snowshoes will provide the freedom to go anywhere.
Final Thoughts: Choosing the Best Snowshoes for Beginners
Choosing the right snowshoes is less about finding the most advanced technology and more about matching the gear to your specific physical needs and the environment you plan to explore. For most beginners, the priority should be recreational snowshoes that offer a balance of lightweight construction and intuitive design. By focusing on a model that aligns with your total weight capacity, including your body, winter layers, and pack, you ensure maximum flotation and prevent the exhausting experience of sinking into the snow. Simple, glove-friendly bindings and a comfortable fit are far more valuable for a first-timer than aggressive, high-cost features meant for extreme mountain peaks.
Once you have secured a pair that feels natural underfoot, snowshoeing reveals itself as one of the most accessible and rewarding winter activities. It offers an incredibly low-impact cardiovascular workout that is gentle on the joints while engaging every major muscle group, especially when paired with trekking poles. Beyond the physical benefits, it provides a unique way to experience the serenity of winter landscapes, turning a snow-covered park or forest into a personal playground. By keeping your initial setup simple and comfortable, you’ll find that “if you can walk, you can snowshoe,” making it a perfect lifetime hobby for winter enthusiasts of all ages.
Nice Post with lot of information and facts.
[…] How to Find the Right Snowshoes? […]
[…] selecting snowshoes, consider the following […]